DIY Quilted Placemats
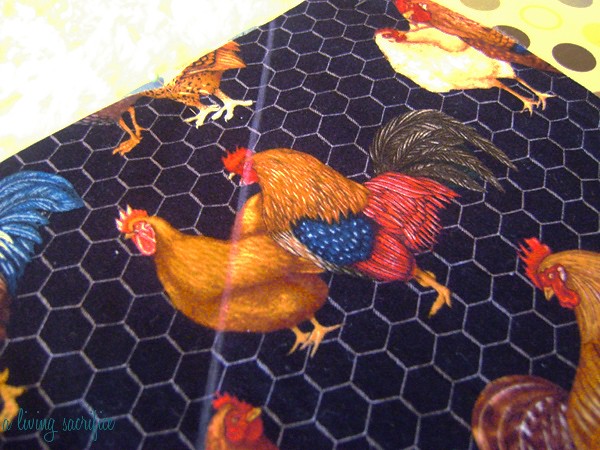
Just before Christmas I was asked to try a new project...making placemats! The same friend who ordered this tote {which I love} asked me to use that same fabric to make her some quilted placemats. She is planning on converting her kitchen to a rooster theme, and I am so excited to see the end result!
I had never made placemats before...but after doing some research and looking at some placemats we had around, I figured out my plan of attack. Really it was quite simple!
I started out by cutting the rectangles of fabric that I needed. I pretty much just guessed on a good size, after looking at the size of some other placemats. I honestly don’t remember for sure what size I ended up with, but it might have been 17x12”?? I have so many measurements written on my white board from things I’ve worked on recently that I don’t remember, haha.
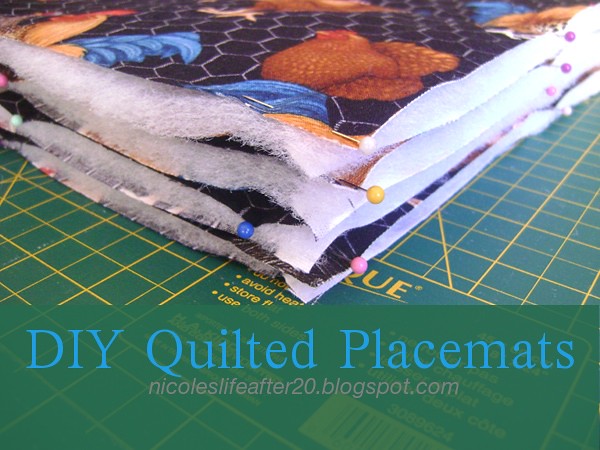
I cut out quilt batting the same size for each placemat. You need two rectangles of fabric and one of batting per placemat.
Iron the fabric good, and pin these layers together. Niiiice and flat.
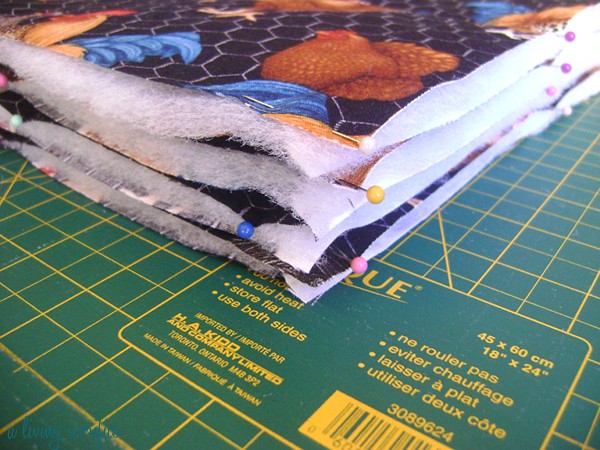
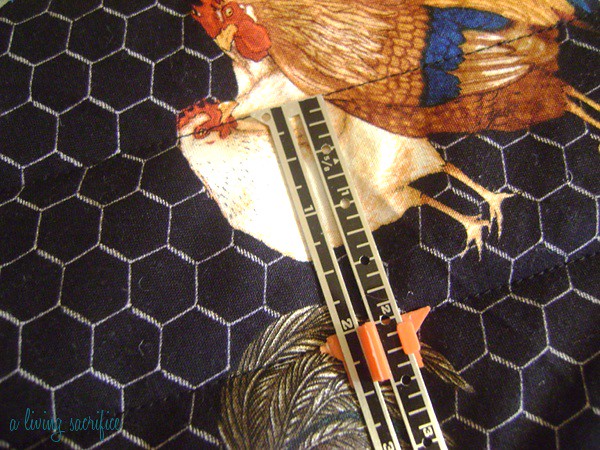
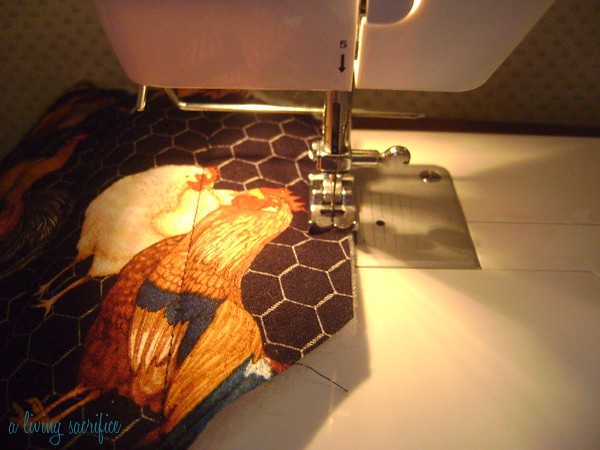
I used a yard stick and chalk to make a nice straight quilting line across the center of the placemat. I have a little quilting bar on my sewing machine that helps me make the rest of the lines straight, but the first one I do this way.
I love using chalk, it just wears off by itself, normally by the time the finished product is complete.
I make my quilting lines two inches apart, but do whatever you think looks best. I also decided to just make the lines going one direction, instead of criss-crossed lines. I find that the more quilting lines you have, the more chances of things getting wonky and misshapen, and I really wanted to end up with a nice flat rectangle in the end. Haha. (I do the criss-crossed quilting lines on my tote bags, if you need an example of what I mean by that.)
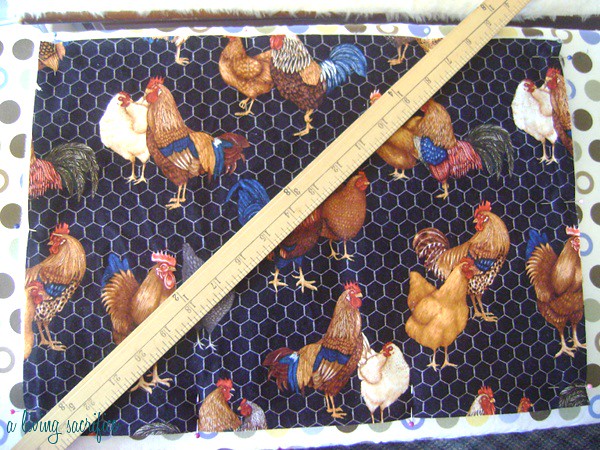
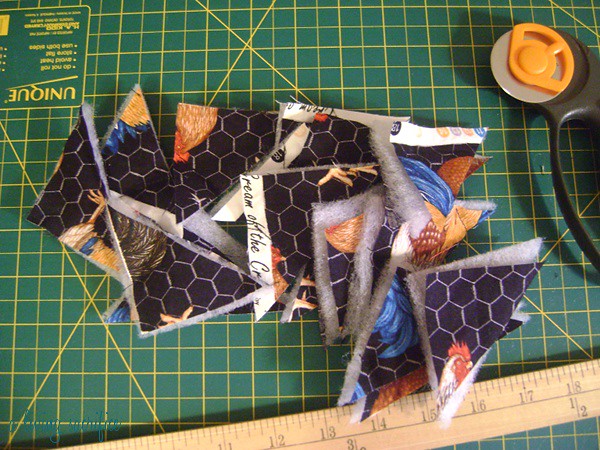
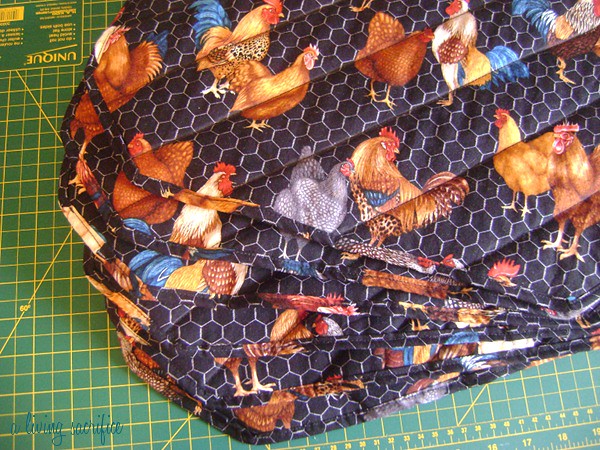
I decided to get a little fancy (ha!) and cut off the corners of the rectangle so it wouldn’t end up being just a normal rectangle. I just used my cutting mat to give me even cuts on all the corners.
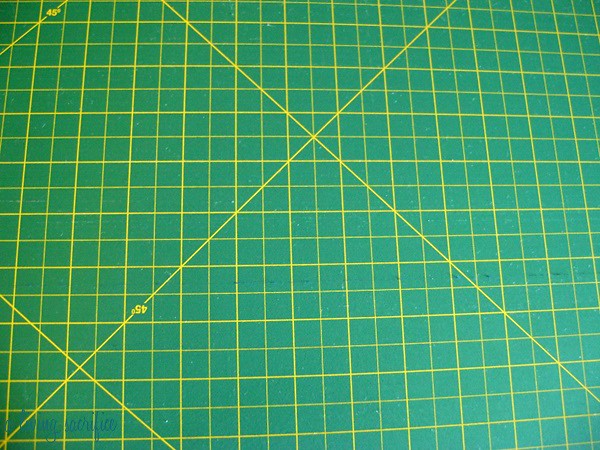
See how the cutting mat has a nice 45 degree corner already printed for me?? Its a good thing, because I am horrible at figuring out things like that! I just set the corner of the placemat in that printed corner, and cut!

Note: if you try this, resist the urge to play with the cute pile of corners. {wink!}
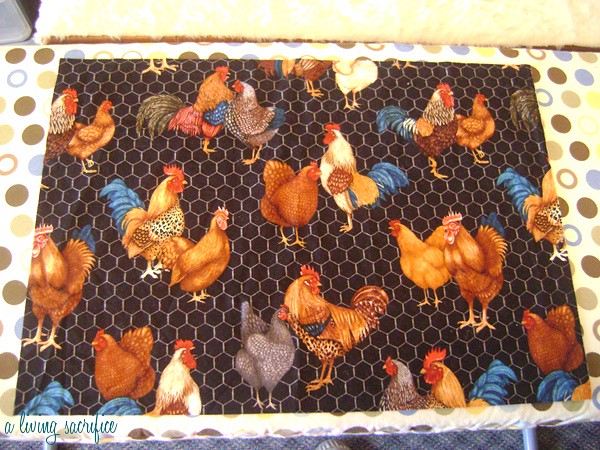
Next I just stitched all the way around the edge of the placemat to hold everything in place. These things are starting to look like the real deal!
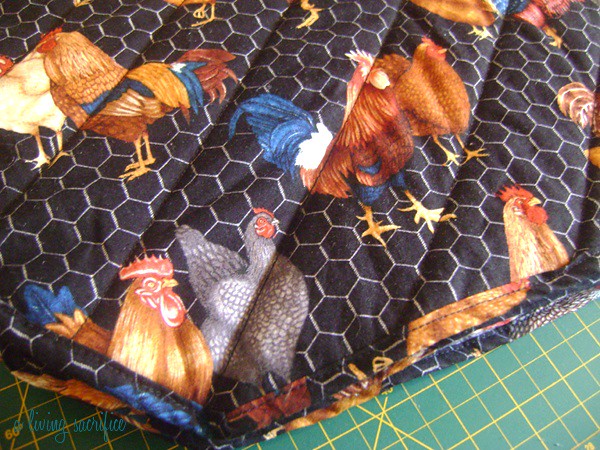
I made my own binding tape-esque stuff for the edge by cutting even strips of the fabric, then pressing the edges in {so there would be no raw edges} and then pressing that in half. I painstakingly pinned that around the edges and sewed it all together.
Let me tell you, this was the tricky part. I kept having to rip sections out and re-sew them to make sure that both sides of my “tape” were catching evenly in the stitching. I also wasn’t 100% pleased with how some of the corners turned out, but at least I don’t have to look at them every day. {wink!} #horriblethingforaseamstresstosay

I was happy with how they turned out, overall!
So there is one of my newest endeavors! Let me know if you try this out! Have you ever made placemats, or anything else for your kitchen? I'd love to hear about it!

I had never made placemats before...but after doing some research and looking at some placemats we had around, I figured out my plan of attack. Really it was quite simple!
I started out by cutting the rectangles of fabric that I needed. I pretty much just guessed on a good size, after looking at the size of some other placemats. I honestly don’t remember for sure what size I ended up with, but it might have been 17x12”?? I have so many measurements written on my white board from things I’ve worked on recently that I don’t remember, haha.
I cut out quilt batting the same size for each placemat. You need two rectangles of fabric and one of batting per placemat.
Iron the fabric good, and pin these layers together. Niiiice and flat.
I used a yard stick and chalk to make a nice straight quilting line across the center of the placemat. I have a little quilting bar on my sewing machine that helps me make the rest of the lines straight, but the first one I do this way.
I love using chalk, it just wears off by itself, normally by the time the finished product is complete.
I make my quilting lines two inches apart, but do whatever you think looks best. I also decided to just make the lines going one direction, instead of criss-crossed lines. I find that the more quilting lines you have, the more chances of things getting wonky and misshapen, and I really wanted to end up with a nice flat rectangle in the end. Haha. (I do the criss-crossed quilting lines on my tote bags, if you need an example of what I mean by that.)
I decided to get a little fancy (ha!) and cut off the corners of the rectangle so it wouldn’t end up being just a normal rectangle. I just used my cutting mat to give me even cuts on all the corners.
See how the cutting mat has a nice 45 degree corner already printed for me?? Its a good thing, because I am horrible at figuring out things like that! I just set the corner of the placemat in that printed corner, and cut!
Note: if you try this, resist the urge to play with the cute pile of corners. {wink!}
Next I just stitched all the way around the edge of the placemat to hold everything in place. These things are starting to look like the real deal!
I made my own binding tape-esque stuff for the edge by cutting even strips of the fabric, then pressing the edges in {so there would be no raw edges} and then pressing that in half. I painstakingly pinned that around the edges and sewed it all together.
Let me tell you, this was the tricky part. I kept having to rip sections out and re-sew them to make sure that both sides of my “tape” were catching evenly in the stitching. I also wasn’t 100% pleased with how some of the corners turned out, but at least I don’t have to look at them every day. {wink!} #horriblethingforaseamstresstosay
I was happy with how they turned out, overall!
So there is one of my newest endeavors! Let me know if you try this out! Have you ever made placemats, or anything else for your kitchen? I'd love to hear about it!


I made coasters (much smaller version, lol)
ReplyDeleteI like how you use chalk for making lines. I have gone through so many pencils, etc at the fabric store and none of them work! It is so frustrating. I think I might just have to go get myself some chalk. =) And I LOVE your cutting mat! Definitely need one of those, lol. The placemats look great, though! Diong basting tape around corners is always tricky, though.
Chalk is the best...and if you can find a good chalk pencil at the store, those are even better because you can sharpen them like a normal pencil. I bet your coasters were really nice!
DeleteI made appliance covers for my Granny's kitchen. They ended up being reversible. Red marbled fabric with black trim reversing to dark blue with white stars. They took alot of work, but she loved them!! :)
ReplyDeleteAshley
Oh, they sound so nice! Doing something reversible is not easy, either! Great job!
Delete