Posts

Showing posts from January, 2012

January DIY Project: Homemade Cubbies

Image
Along with my monthly Pinterest project , I decided to tackle one monthly project that involves some DIY. And boys oh boys, was I excited to get to this! I wasn't sure if it would work...and it is totally redneck, I'm sorry to say....but it came out *so*good*! Lets get to it, shall we? You knows those Expedit shelves from Ikea that everyone and their neighbor's sister's barber's son is using these days? Well, I dig those things...but we don't have Ikea around here. Boo. That was my inspiration, however, for this project. So this is what I had in mind.... ...even though my end result doesn't look a thing like that. But we'll get to that in a minute. At the top of our stairs to the second story of our house we have this awkward little hall. It is made even more awkward by the slanted ceilings, which doesn't leave you much room to work with. So while we did have a fair amount of floor space to store extra blankets and sheets... It is A) really hard to
Time To Get Your Swag On!

Its been a while since I talked about Swagbucks, the search engine that helps you make money while searching the web! I think there are probably a whole lotta you guys already using it, but for those that aren't, I wanted to be the first to fill you in on the greatness. Swagbucks is not a gimmick, scam or anything else bad. Its genuine - I've been using it for while now! This last Christmas I was able to redeem my swagbucks and score $10 worth of Amazon gift cards to use towards a certain present I was purchasing. That made my purchase price gloriously low! It was such a terrific feeling, that I am going to be vigilant about using Swagbucks all year long, and do even better for Christmas of 2012! Maybe you would like to do the same! Here are the ways I earn Swagbucks: - By searching. Using the swagbucks search engine makes the most dough. Normally every day I do a search I earn something, anywhere from $10 to $25 in one search! This is the best way to earn bucks. -By voting. Un

January Pinterest Project: An Organized Power Strip

Image
I decided, with the whole "12 in 2012" vibe going on this year (which is pretty sweet, if you ask me...next year "12 in 2013" just isn't going to have the same effect) that I would do one Pinterest project a month. It won't always be some big DIY project, but just putting into practice something I pinned. I have a ton of great ideas on my boards, I just don't ever use them! So here is the inspiration pin for my first project: Source: unplggd.com via Nicole on Pinterest Genius, right? I can do that. And I had the perfect place to try it out... The mess that is the corner of our church by the piano. Oh my. Sooo many cords and messiness, due to different things on the piano and the sound system. Here is the breakdown: I knew with that huge mess, it wasn't going to be enough to just label the cords like in the Pinterest picture! No, I had to do something to clean up the area...it was bugging me to death! So I grabbed an old shoebox.... And cut the top

New Bedroom Art

Image
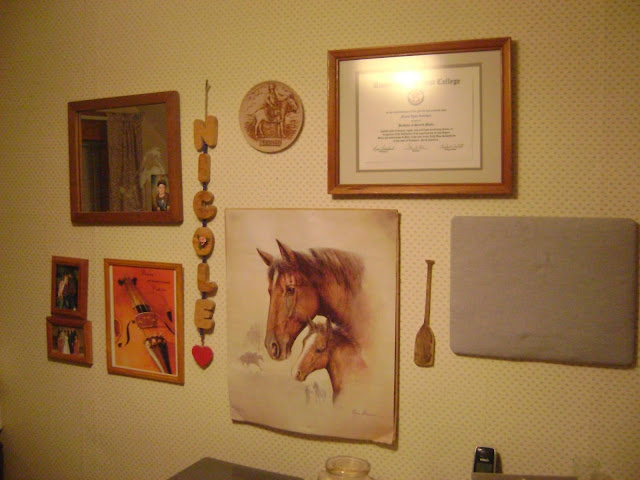
While I was cleaning up some Christmas clutter and looking through some of the things I have in storage in the attic, I decided to do a quick little project and add to the art on my bedroom wall. I really only have one wall for art (because of the weird slanted wall on the other side) and that one wall is kinda turning into a gallery of various art. Observe: This is the before. Although it is not truly the before, because you might notice the odd frameness going on in the bottom left corner. Basically that one small vertical frame used to be hanging horizontally like the one below it...then I got a vertical picture and that is when the awkwardness began. But I fixed it. Keep reading. I laid out some of the new things I wanted to put up and, in my Sherry obsessiveness, used newspaper to lay it all out on the wall. It really works very well! And the after... Gotta love how fast the internet makes that process, eh? Wish it happened that fast in real life! Here are some closeups of the

Our Plastic Storage Organization

Image
Is anywhere out there like me? (Scary, I know.) I don't know about you, but I call all our plastic storage in the kitchen "Tupperware." And when I try to think of another name, all I can come  up with is "Rubbermaid." Do you do that? I don't know what else to call it, even though we use other containers besides Tupperware and Rubbermaid. Oh well. Now you know why this post has such an awkward title. :) Those plastic containers that we use in the kitchen to store food (hmmm...I'm thinking that isn't a good thing to call them, either) can be such a pain to store! We had two cabinets full of them. Our method of putting them away was, open the door, throw it in, and close the door quickly so nothing falls out! NOT a very good method (shame on us) and not very helpful when it comes to finding a container....or its lid! So I decided, with a little help from Rachel, to tackle those shelves and create a functioning space we could all keep neat. We began by e